Your cart is currently empty!

How to setup Signature in Email Server
In this post, we will be showing you how to setup Signature using our email server.
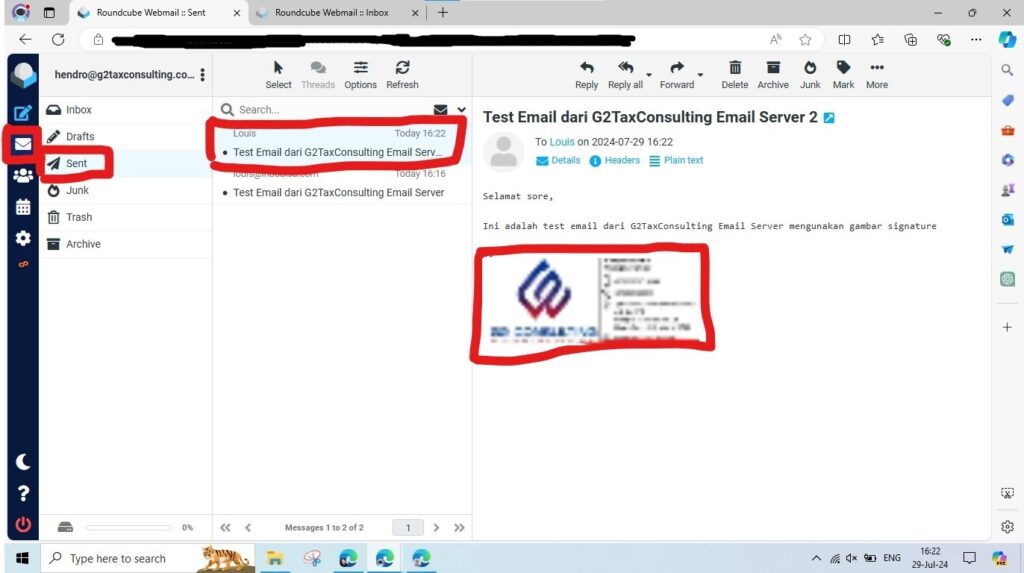
If you want to include a signature image in your emails when sending using our email server like the above, this is the right post for you!
Remember to do Step 2 until Step 4 for each of your Email Address that you want to have signature images. The settings are only for the logged in email address and does not affect every email address.
Steps
Step 1: Purchase an Email Server
If you have not owned an email server, you can purchase one from us at cPanel Email Server 25GB 1 Month Subscription and License Package – IndoBisa.com or contact us at https://indobisa.com/us/contact
We can setup an email server for you and give you the access link. From there on, you can continue to the next steps.
Step 2: Login

Once you have your email server, go to your email server link provided by us. The link should be like “webmail.yourdomain.com”. We also will send the email address and password for you.
Type in your email address and password then press Log In.
After logged in, if prompted to choose which software to use, choose “roundcube” by pressing the “Open” button.
Step 3: Setup Signature
After logged in, next step is to setup your signature.
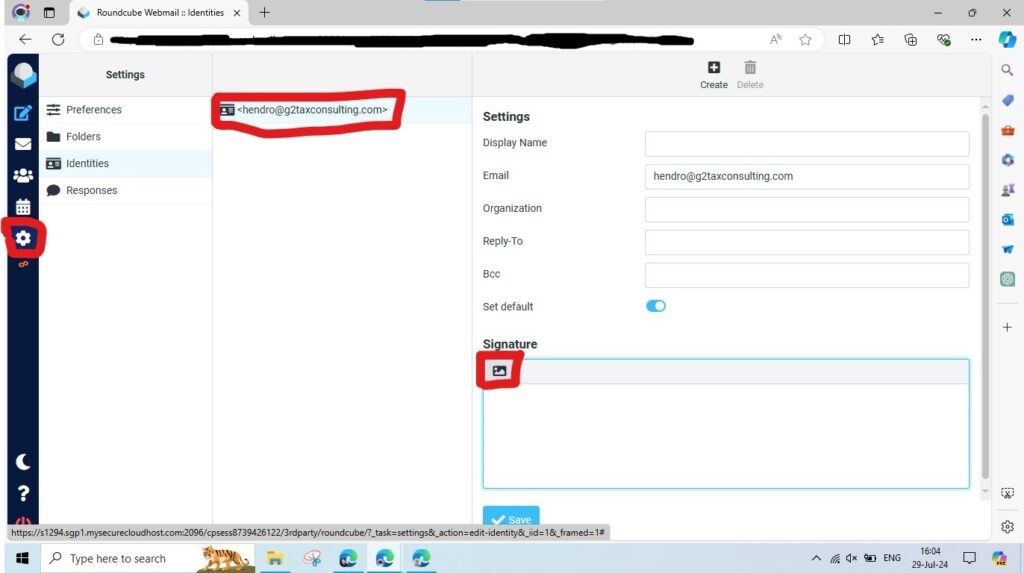
Press the Settings Gear Icon, then Press “Identities”. This are the list of identities you have in this Mail Server Account.
Next, press your email address. The Identity form should appear on the right side.
After that press the Image Icon below “Signature” section.
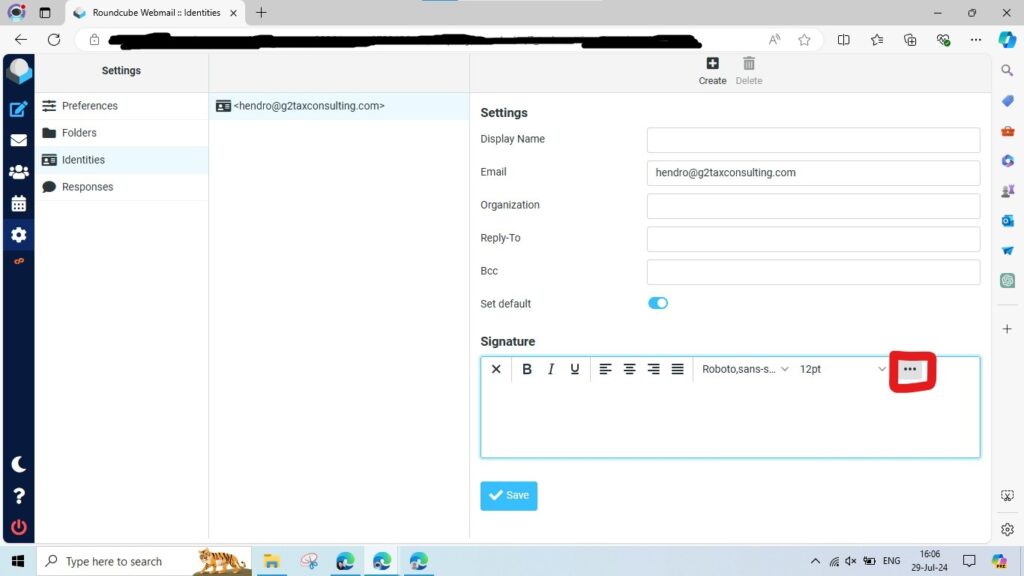
The Signature section will turn into something like the image above after you press the Image Button. After that, press the Three Dots Button.
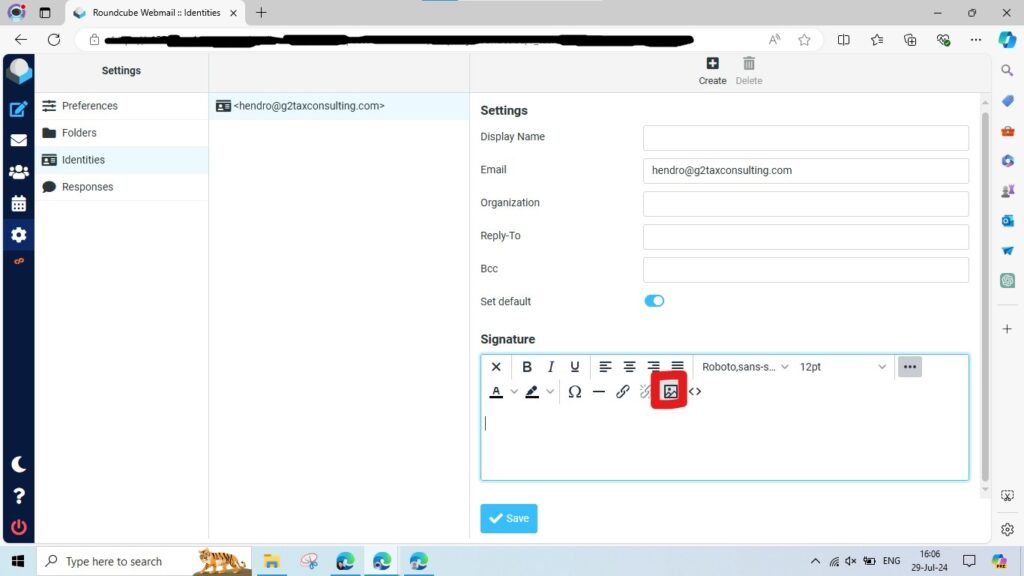
More menu buttons will show up after you press the Three Dots Button. Next, press the Image Button inside the more menus as seen in the image above. This is for inserting our Signature Image.

Once pressed the signature image button, a pop up will be shown like the above image.
Next, press the Upload Button as seen in the image above to upload our signature image to the mail server.
Make sure you have your signature image file ready on your local computer before pressing the upload button (can be PNG, JPG, JPEG).

After pressing the Upload Button, another popup will be shown. This is the Select Image form.
Next, press the “Add Image” button and choose your signature image you have setup on your local computer (can be PNG, JPG, JPEG).

Then after choosing your signature image file, the image preview and name should appear in the Select Image Form List.
Next, press on the list item showing your uploaded image to select the image.
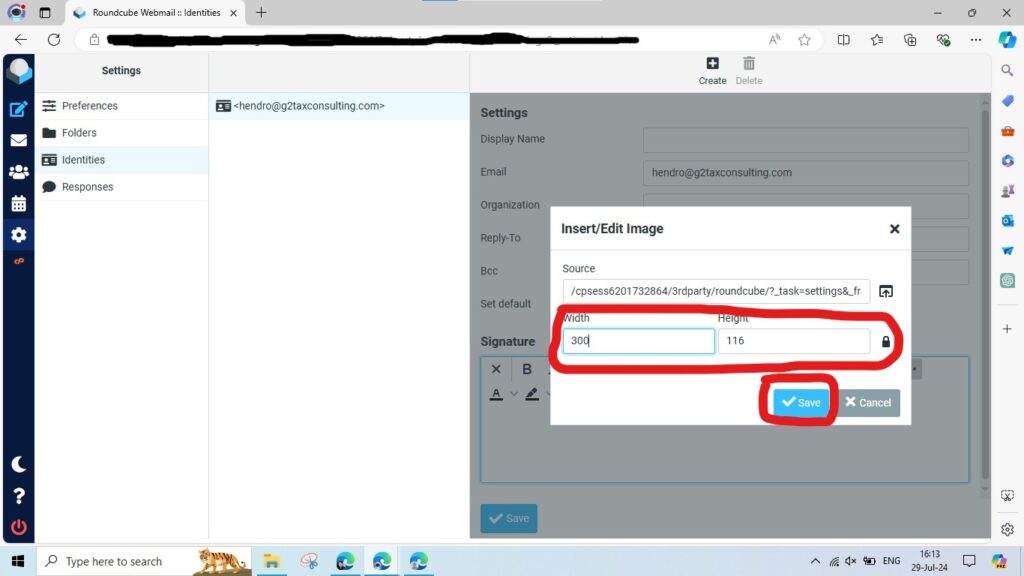
Once signature image is selected, edit the image size to be around “300” width (it is in PX or Pixels). The height will update automatically based on the set width.
You need to set the width to be around 300 px because if it’s too big, it will look not good on emails.
After you have finished setting the width, press the Save button to save the signature image.

After saving the image, your Signature Image should appear in the Identity Form Signature Section. Next, press Save Button to save your identity.
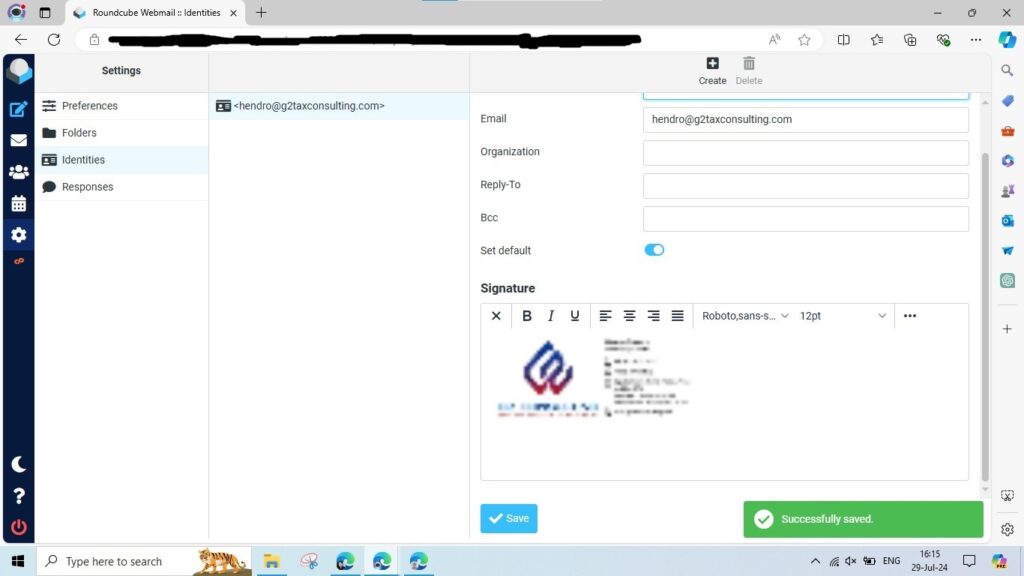
The signature image should be shown without dark background once Identity is saved. Thats it for the Setup Signature step, congrats for making it until this step! We got couple more things to do.
Step 4: Additional Settings
Right now, if you try sending an email, you might notice that the signature is not yet shown even after you setup the signature settings correctly.
Why is that? We will see in the following images.
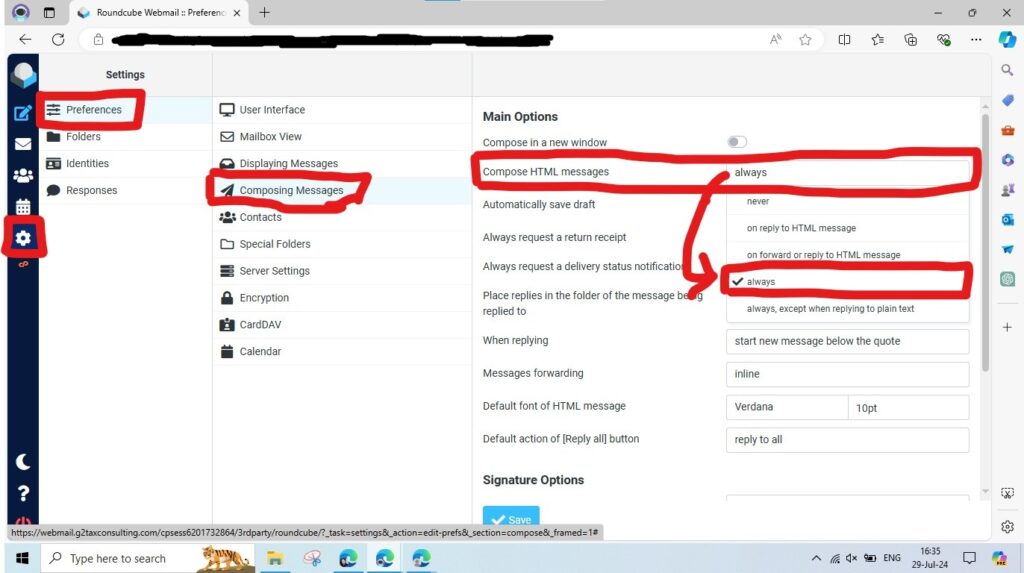
To enable the signature image all the time when you send an email, you need to do additional settings. One of them is you must enable Compose HTML and set it to “always”.
To do that, press the Settings Gear button, then press the “Preferences” button.
Next press the “Composing Messages” button. Then the Composing Messages form should appear on the right.
Find “Compose HTML messages”, then press the input. Press “always” as the value of the input.
This will allow images to be shown inside the email body when you send emails.
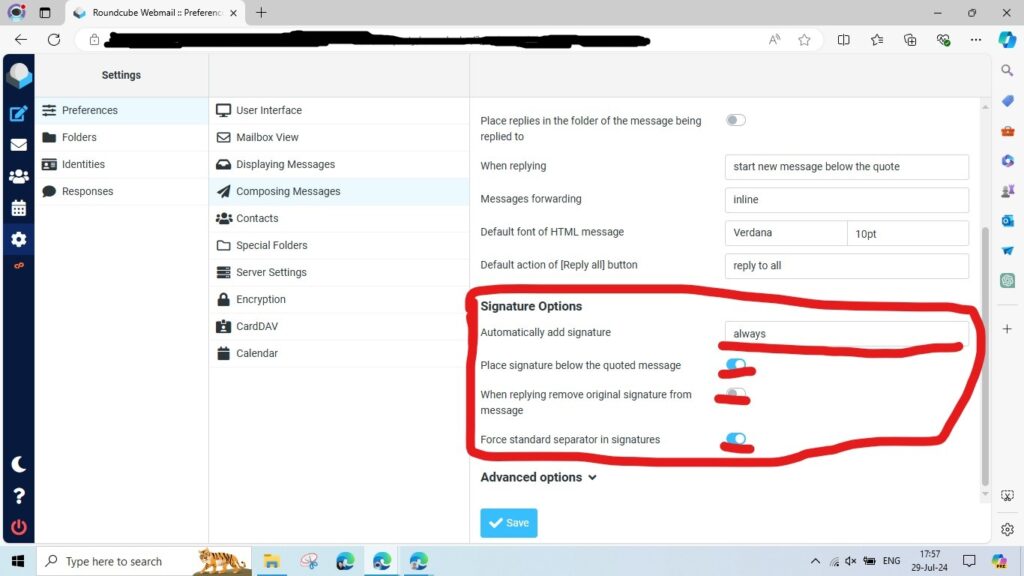
Next still in the same Composing Messages Settings, scroll down until you find “Signature Options”.
Make sure the “Automatically add signature” is set to “always”.
Make sure also the “Place signature below the quoted message” is turned on “blue color”.
And last make sure the “When replying remove original signature from message” is turned off “white color”.
For the “Force standard separator in signatures”, it is up to you to set. If turned on, there will be a separator “–” between your email content and your signature.
After you’re done, press “Save” to save your Composing Messages settings.
Next, we will be testing it out and sending email using our Signature Image.
Step 5: Send Email

To send an email, press the Send Button located at the top left (the first sidebar button). There you will see automatically the Signature Image should exists in the Email Body input.
Type in the “To” email addresses, Subject, and Body.
You can also attach additional files in the right side.
After that, press “Send” button to send your email located on the very bottom.
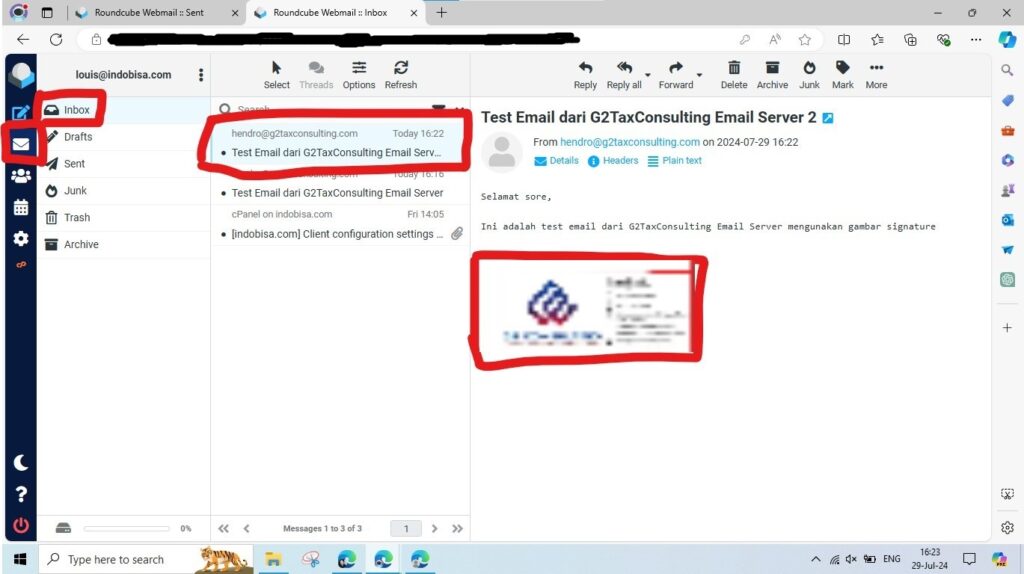


As you can see, if you press “Sent” button on your Mail, you can see the email you send have the Signature Image. The receiver should also receive the email with your Signature Image.
Here we also tested it on sending to Gmail emails, it also works.
Thats it on how to setup Signature on our email server, Congratulations!
Thanks for reading until the end, and good luck sending emails with signature!
If you have any questions, feel free to ask us: https://indobisa.com/us/contact
Leave a Reply